
by jcastles | Mar 9, 2014 | Recipes
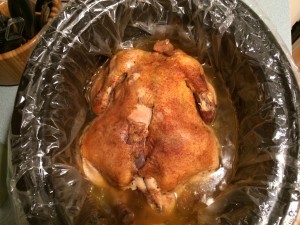
So with my son’s Crohn’s Diagnosis almost a month ago I’ve had to change a little bit of things around the house. He’s discovered he loves roasted chicken and turkey but getting out at the end of the day to buy one to be warm for dinner is just about impossible during the week. I’d seen several recipes online that were close to what I wanted but not exactly.
I decided to give it a go. I’m so glad I did!! My son said this is the best chicken ever….it’s my new favorite!! He usually eats all meat with bbq sauce but he said this chicken didn’t need it at all! That’s gotta count for something right?!
Ingredients
- whole chicken, frozen or thawed (I used frozen, minus the bag of giblets in the chicken-I tossed them)
- seasoning salt
- chopped onion
- 1 can chicken broth (I used a bullion cube with 1 cup of hot water)
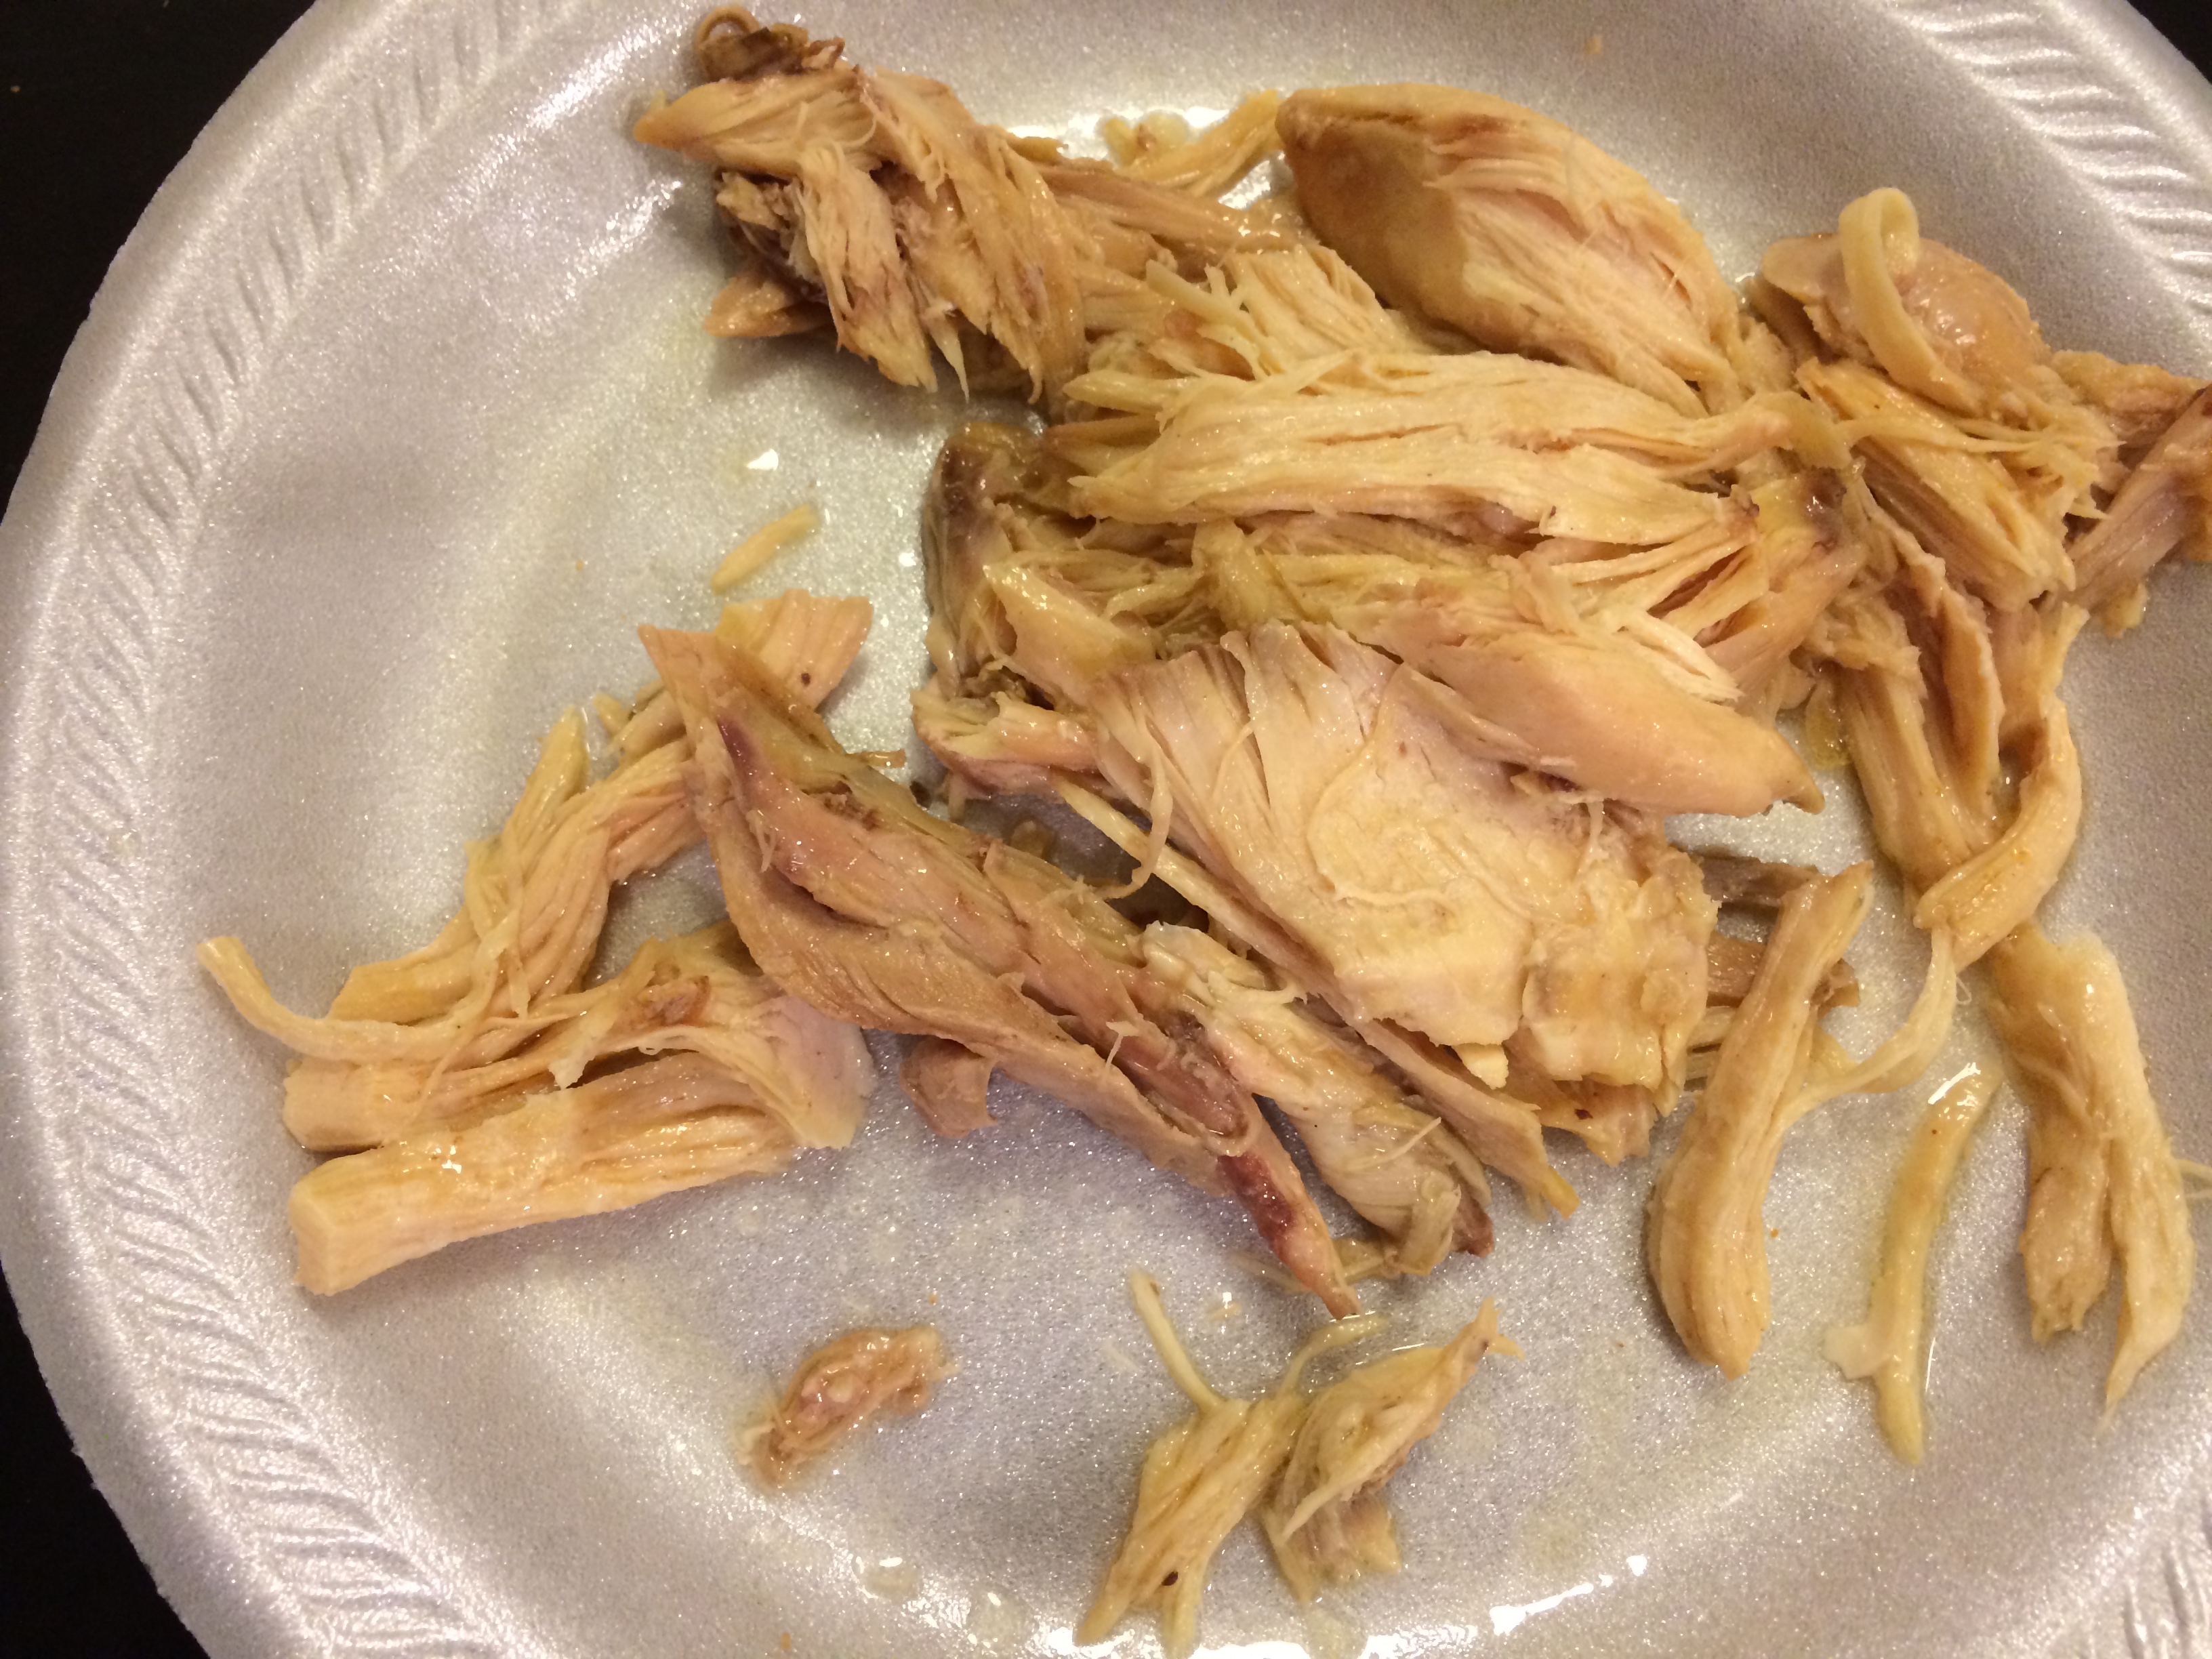
Sprinkle a little of the onion and seasoning salt on the bottom of the crockpot. Place chicken in the crockpot. Cover the chicken with seasoning salt and onion. Add chicken broth around the chicken (don’t pour on the chicken or you’ll lose your seasoning–if you do just re-season). If your using a frozen chicken cook on high for 8-10 hours. If thawed I’d cook on low for at least 6 hours. About half way through the cook time I took some of the broth in the bottom of the crockpot and spooned some over the chicken. The meat will literally fall off the bone! I had to use tongs to dig it out of the crockpot.
We served with buttered noodles, carrots, and a slice of bread.
I hope you enjoy this as much as we did!

by jcastles | Nov 25, 2013 | Recipes
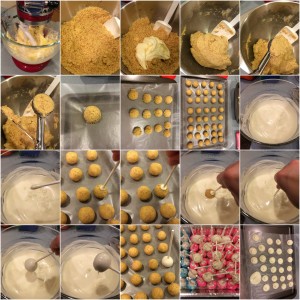
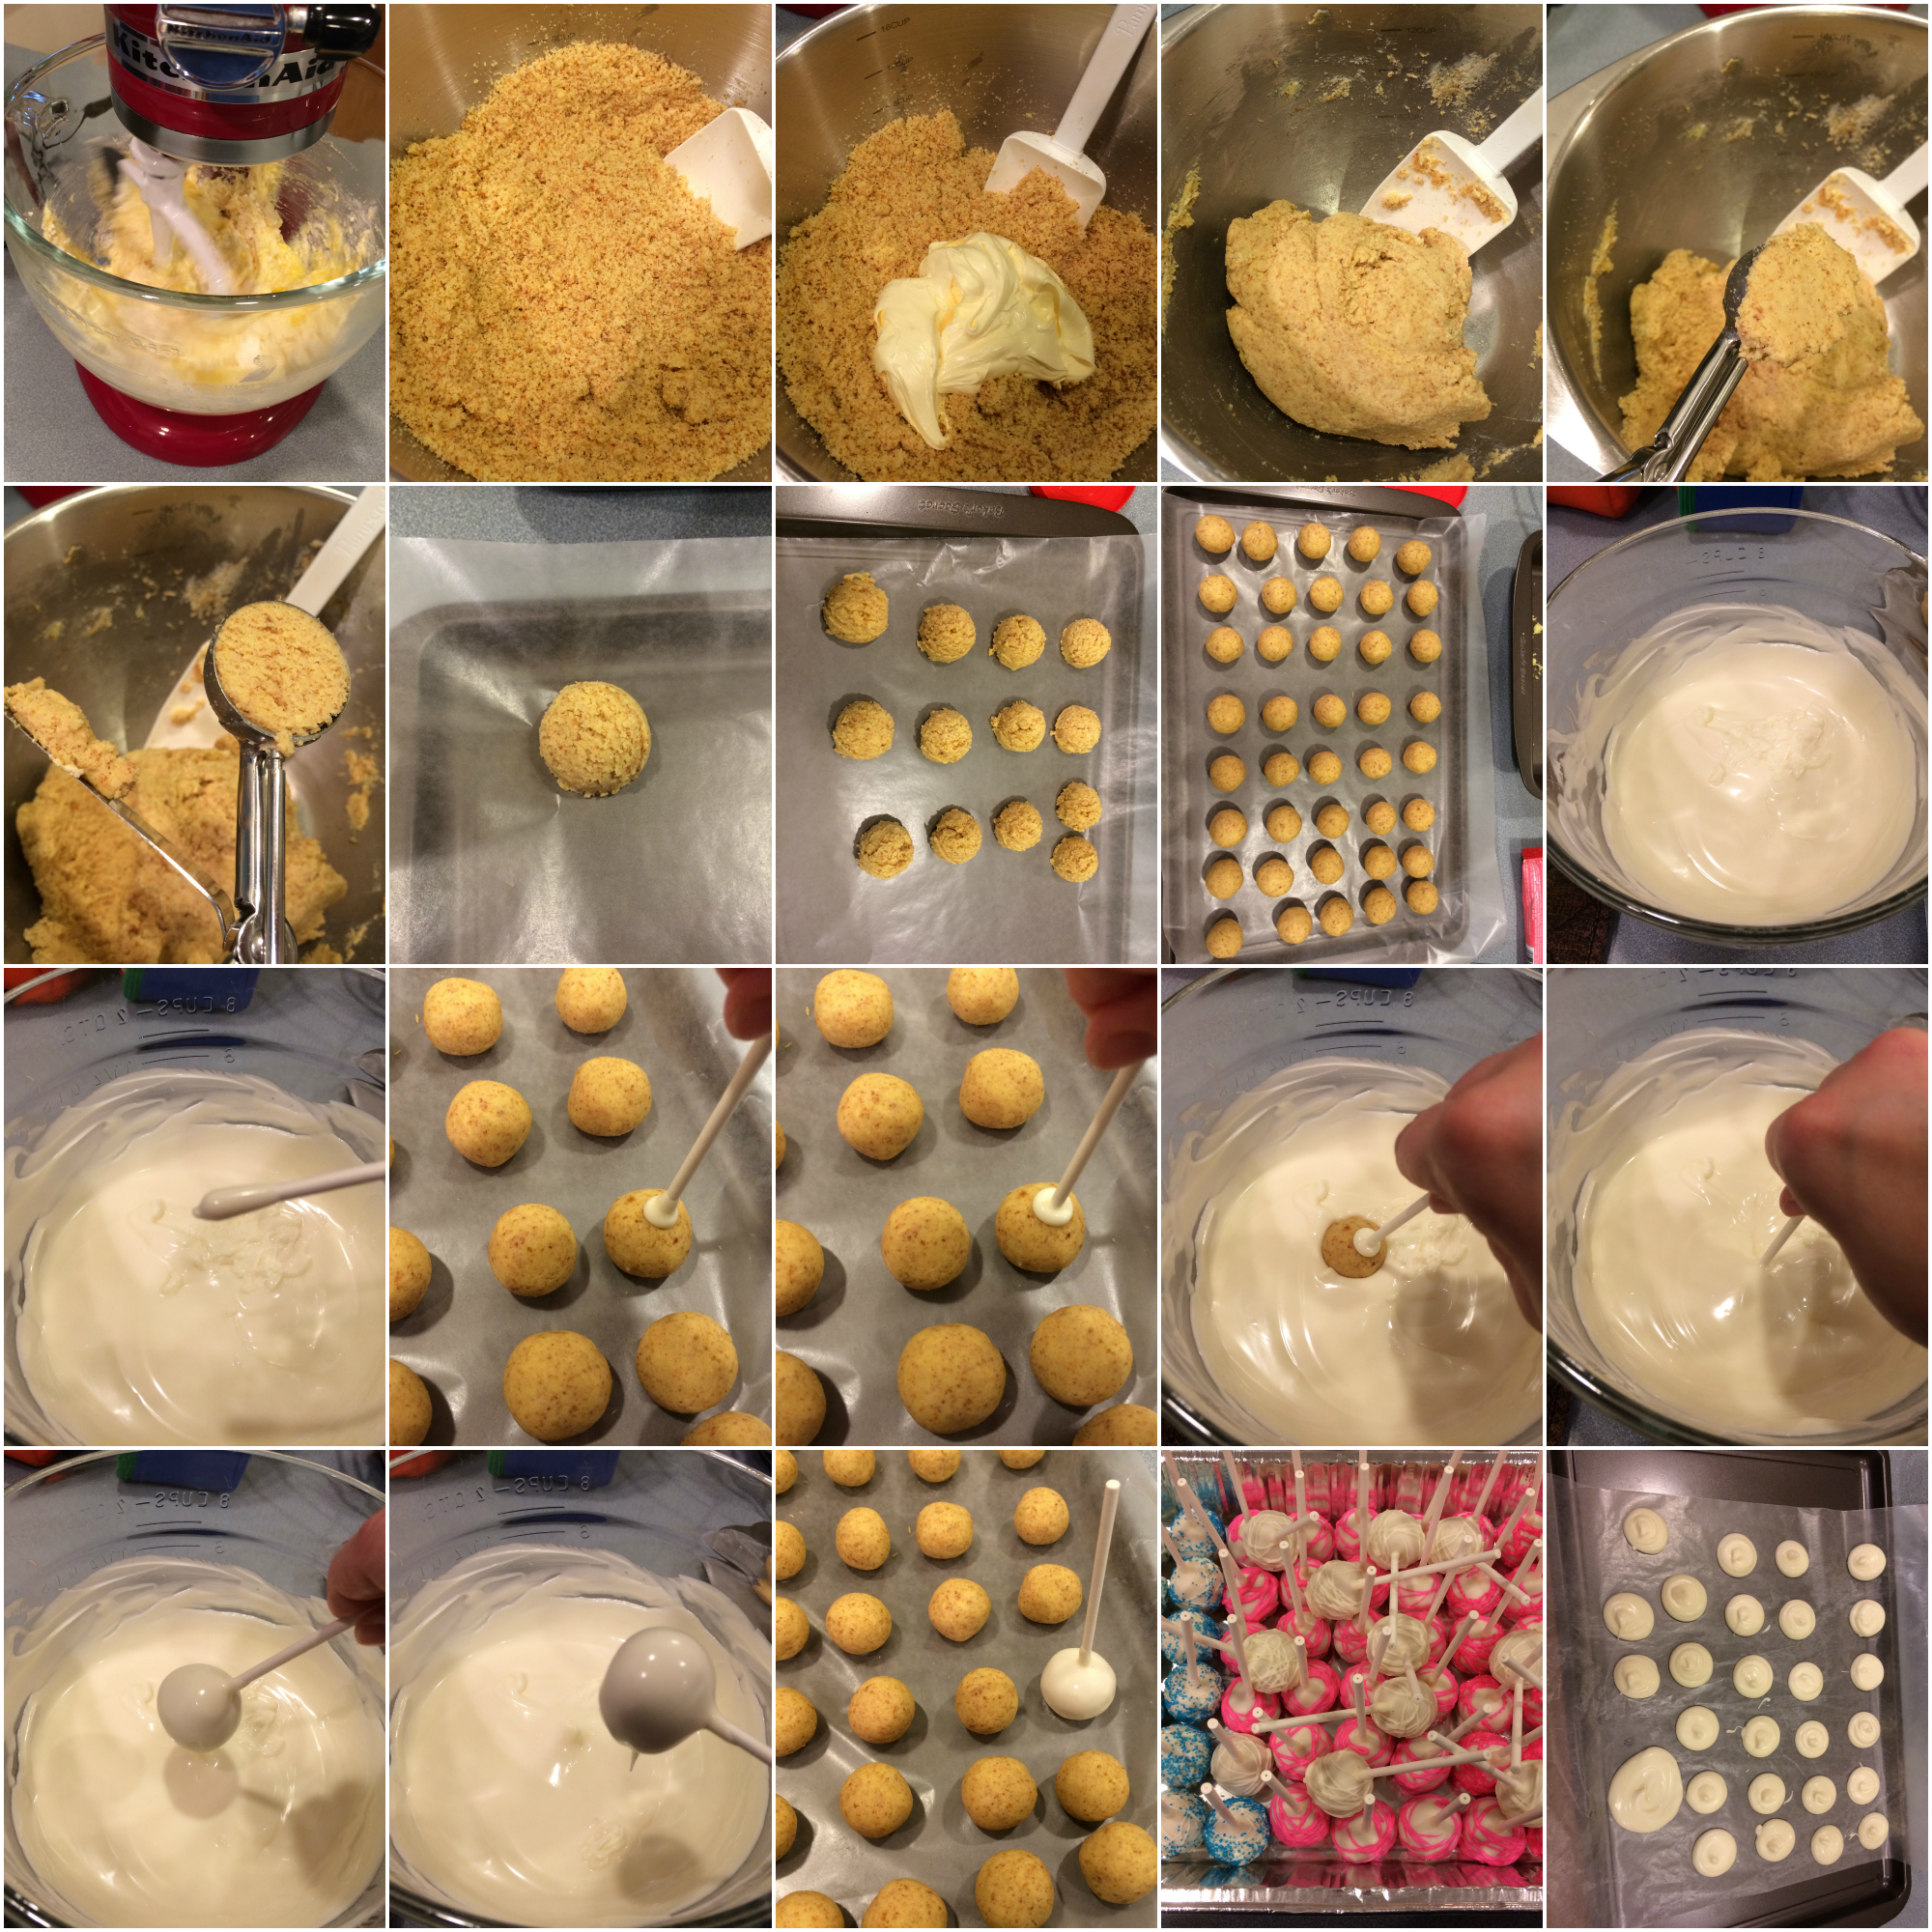
I’ve been asked so many times for instructions on how to make them I finally took pictures of my process to go with my written instructions. So here they are! I hope they’re easy to follow. If not PLEASE ask and I’ll update.
Here are the written instructions and photo’s: Cake Balls
/Pops
by jcastles | Jul 24, 2013 | Recipes, Uncategorized
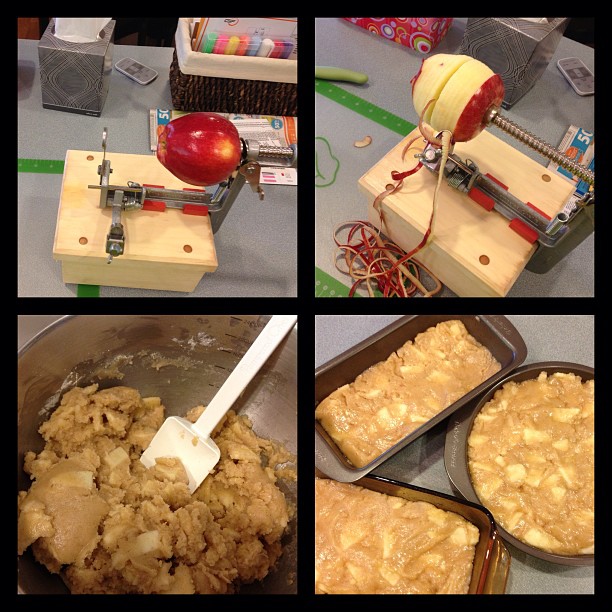
If you hate apples (like I do) you should really try this cake. Honestly if you left the apples out and added a little water I bet it would taste just as good…the batter is sooooo good!!
So because I want to share it with you and I want to be able to access the recipe from the store I wanted to post this most delicious apple cake my grandmother always made for me. I would look forward to this cake every holiday and summer. Once she passed in 1995 I had no idea what happened to the recipe but once my mom got ill (2004) she gave me her cook book and I found this recipe tucked away inside! I was so excited and I make it once a year. I’m usually the only one that eats it but I eat on it for days.
Today I decided to make it in several pans so I could share with neighbors…..hopefully, lol!!

Granny’s Fresh Apple Cake
Mix 2 cups of sugar, 3 cups of flour, 1 teaspoon of baking soda, 1/2 teaspoon salt, 1 teaspoon cinnamon, 1.5 cups of oil, 3 cups of thinly sliced/chopped apples, 1 cup of nuts (can omit), 2 eggs, 2 teaspoons vanilla. Bake at 375 for 55 minutes or until center comes out clean.
That’s it! Enjoy!
by jcastles | May 27, 2012 | Family, Recipes
It came and went so fast. We celebrated our 9th wedding anniversary on May 24th! Well we actually had our “dinner” the night before so the older kiddo could watch the other kiddo’s since he had that day off work.
We were given an Outback Steakhouse gift card so yah….we went there! We both had the new york stip steak, garlic mashed potatoes and a salad! And we had to get the bloomin onion and scarf as much bread as possible! We were so full from our meal we decided to get dessert to go. He got cheesecake and I got key lime pie….they don’t really have a selection so i settled on something i’d have a bite of and pass it on to the hubbs. Which is what happened 2 days later!
On our actual anniversary the hubbs came into the bedroom after I woke up and he had 2 glasses of what looked like champagne or white wine. It was red bull! We’re funny like that…..who has a red bull toast?!

Since we celebrated our anniversary with a nice dinner the night before I knew we weren’t going to do anything the rest of the day so I decided to make a nice dinner and his favorite dessert!
Pork chops, buttered parmesan noodles, carrots, and his favorite chocolate pie!


In preparing this dinner I knew I wanted to make something good and we’ve had a lot of chicken lately so I went with pork chops. I wanted to do shake n bake but kroger was out of the generic and I just couldn’t/wouldn’t pay for the name brand there…yeesh it was expensive. So I went with seasoned bread crumbs and seasoning salt….yah, I should have paid for the brand. Then I wanted a buttered noodle and I had some leftover parmesan so I added that to the noodles. OMG best thing ever!!! It’s definitely going to be a new favorite around here. Then I chose regular ole canned carrots and added salt, pepper, and butter. Easy yummy satisfying dinner!
The chocolate pie is just a regular ole jello pudding chocolate pie. I just put my cool whip in a pastry bag and piped it on top and added mini choco chips. The hubbs favorite crust is the shortbread but kroger was out of it too! So I went with a chocolate crust since we both don’t really care for a graham cracker crust.
Happy Anniversary dear! Let’s have MANY more!! Love you!.
by jcastles | May 4, 2012 | Birthday Parties, Family, Recipes
Well…I dunno if it was the best but it sure was for me and everyone that came! Here’s a snapshot of the items we made.


The cupcakes are not in the ninja colors my son wanted….but it’s so hard to get red frosting!! So if he wanted frosted cupcakes he was getting what I made, lol!
I did make the white buttercream frosting but I had a little trouble with the chocolate frosting this time. Which is weird since I’ve made it before with no problem. But this time it was so gritty. I tried all the tips online that I could find on how to reduce or fix the problem but nothing worked. I eventually had to toss it. I think I know what the problem was…..I started out using one brand of powdered sugar and finished with another. It was the Target brand powdered sugar….even in the bag is was so gritty. I tossed it too! So at 11 o’clock at night I wound up doing what I thought was best….canned frosting!! I know I know!! But I had everything on such a tight schedule that I didn’t have time to mess around with it and well…it was for a kids party…not like they really care. It was frosted and yummy! Sure I could have started over but I had already tossed a batch of red buttercream…that looked more mauve and speckley than the elmo red I was going for.
Each kiddo got to take home a sword, headband, sushi, and popcorn (and some snuck home the ninja stars–that’s ok though). They all loved it too!
Ok…so now the good party stuff!

My hubbs designed the invite (I want to say i’m sorry for all my input but they turned out fantastic!). Then we sent it to Walmart and had them printed….which I love because it’s WAY cheaper to do that way! We spent under $7 on 35 invites! But the real money was spent on the envelopes….$10 at Michaels!! Still not bad (I used my 20% off coupon–get their app and become a rewards member to get their coupons). We could have gone with plain white generic envelopes but this was a cool party that needed cool black envelopes.
The thank you card is being created now so I don’t have an image of that but it’s going to match the invite.
For weeks I’d looked online and got lots of good ideas for stuff to make for the party. We wanted swords, chinese stars, the sushi snacks, pinata, chinese lanterns…the whole deal! So we started planning.

We had everything planned down to the minute…and of course that didn’t go down the way it was suppose to. We let the kids play on the playground as they arrived until the pizza arrived. It was suppose to be about 30 min of free play there..wound up being 45 minutes but I don’t think they really cared. Once the pizza got there we ate lunch then cupcakes. It was so windy out that I couldn’t even have a candle (or the decorations I’d bought–grrr, I had some cool chinese lanterns that I searched and searched for too) so I told my son to pretend to blow the candle out. He took me seriously and as he leaned in he got a cupcake smooshed in his face…..total accident!! Seriously it was! I was thinking about doing it though. After food we played some ole fashioned games!


Our first game was Capture the Ninja. We broke the kids into groups of 2 and gave them 2 rolls of crepe paper (dollar tree—2 for $1!!). They had so much fun! Then we made a game of picking up all the paper and throwing it away, lol!!


Our second game was the ninja star throw. We found some stars we wanted to order on Amazon but we waited WAY too long to order them so I said I’m sure I can make them outta duct tape. Turns out you can! But I couldn’t….at first. My stepson is a duct tape guru. Seriously he is! He made a duct tape suit once…yah, he’s awesome! So I said here’s the duct tape and here are the instructions, show me. Nope, still couldn’t understand it. So he made me 4 (all the time we had that day before he had to go to work). So while he was at work I tried and tried and tried. And finally like they always say…practice makes perfect….I had done it! I was a ninja…a true duct tape ninja star maker! So I made 8 more! Yah they’re awesome! This is the tutorial we used.
To play the game we used a hula hoop we got at The Dollar Tree, duct taped it to a large wooden dowel and spray painted it all silver….oh and our grass in the front yard, lol. So they stood a good distance and each kiddo had 3 turns to toss a star through the hoop. But we were going to let them until they got it through. Most got it through the first time so I’m guessing it wasn’t as hard of a game as we thought. Once they got it through they completed ninja training and received their sword and were allowed to battle.


Our last game was the Ninja Battle. We loved the paint stick idea for the swords (paint silver use duct tape for the handle) but when Home Depot was out of paint sticks (we even offered to pay for them hoping they’d find a stash, lol) we decided to go another route. We bought eight 8 foot foam pipe covers and cut down to sword size. Each made 3. Then I took black duct tape and wrapped 3 pieces around one end to make a handle. We really liked it in the end because they are much safer and the kids could actually use them at the party rather than a wooden sword no one would let them use…ever!
The sushi was very fun and easy! Everyone loved it. I got the tutorial here. Seriously so easy. My concern was how the fruit rollup was going to stick to itself but it’s pretty sticky and it stuck to itself with no problem. I actually made them the day before and tied them in lil bags. I was worried they’d dry out so I didn’t use the twist tie show above, I changed it after the pic. I used regular ole gift wrap ribbon and tied them real tight. We had no issues with them being dry. I actually ate one several days after the party and they were still super yummy!
I really loved this party! It was so much fun! All the kids and adults really enjoyed themselves….even ole Aunt Kim…I won’t post the pic unless she tells me I can but she’s one awesome ninja aunt!
.
by jcastles | Apr 18, 2012 | Recipes, Uncategorized

A couple weeks ago we made this bbq chicken and it was D-E-L-I-C-I-O-U-S!!! We were skeptical at first but since I found it on Pinterest we had to try it!
Since I’ve been on Pinterest I’ve tried to make 1 new recipe at least every week. Even if it’s a dessert. I don’t pick meals that are going to take me a long time to make very often, I try to keep it simple.
Well when we ate the bbq chicken I said this would be good as a chicken taco. Yesterday I made those chicken tacos and OMG OMG….they are the best bbq chicken tacos i’ve EVER had!! But what was even better was the bbq chicken quesadilla I made. Just look at the inside!!

What I did was butter 2 flour tortilla’s, added some of the bbq sauce mixture onto the non buttered side, added shredded chicken, sprinkled a little colby jack cheese on top and topped with the other flour tortilla. Then I heated a skillet on high and added my quesadilla (turn heat down to med-low). Cook on each side for 1-2 min. It was seriously sooooo yummy!! I’m glad we have tons leftover!
Here’s my stepson enjoying his gigantic dinner, lol! He has 2 chicken taco’s, 1 chicken quesadilla, and for dessert I made a giant peanut butter cookie with mini reeses candies! He was so full he couldn’t even eat the pie slice of his cookie!
 .
.


Recent Comments